DESCRIPTION OF MY IDEA:
The assignment brief for this project read as follows:
«What other ways can we use to control a computer, other than simply using a keyboard and a mouse? This project seeks to explore a range of inputs using electronic hardware such as – buttons, switches, sliders, knobs – and how, when used singly and in combination, they can affect computer-based realtime environments.
We will explore the technicalities of how to build simple control circuits using Arduino and Firmata – creating a ‘control device’ – and develop further our understanding of how to make responsive digital artworks. You will also be introduced to soldering and laser cutting techniques to aid your fabricating methods. This project has a focus on a physical three-dimensional resolve and you should consider how the ‘control device’ is developed in tandem with the realtime output so that there is a clear relationship between the two.
The project is based around the keyword control and you should consider this word both in its literal and in its wider contexts – the notion of controlling; forced control; expressive control; control as having both positive and negative connotations.»
My idea for this project was rooted in my passion for video games and especially video game controllers. I considered loads of different controller designs from the inception of video games up until the current day. I considered what had brought us to where the controllers are today, and the standards controllers must follow to be viewed as a good controller in todays market. Without going to much into the history of video game controllers I can say that the industry took a big turn in 1997 when Sony released the DualShock controller for the playstation 1 . The DualShock set the standard for what controllers have been like ever since. The defining factors in this controller came down to a few things: the ergonomics, the four button layout in addition to a directional pad, and of course the biggest change: the dual analog joysticks. All these factors are still as important in current day game controllers as they were back then.
The dual analog sticks are now so ingrained in the gaming industry that as soon as they’re removed it alienates a vast majority of users. Even touch screen based games (granted they’re 3-dimensional) emulate the control scheme that you see in the DualShock controller.
My idea is to ‘fight’ muscle memory and the familiarity you feel when holding / using a conventional video game controller. I wanted to design and make a new controller that’s purposely different from the conventions. That means no dual analog joysticks, no four button layout, and no directional pad. When making the controller I didn’t have the idea of purposeful difficulty in my head, but rather the idea of turning every convention on its head, which would in turn lead to difficulty because of the muscle memory we’ve built up throughout our lives. I wanted to explore what the conventional controller could have looked like if video game history took a different turn at some point in the 80s. To accompany the controller I wanted to have a playable game. A game that would navigate in 3D, as that’s where the dual analog controller really thrives. The left joystick for the movement of your character, and the right stick for controls. In order to make something compatible with 3D movement I needed to be able to control the character, and the camera movement.
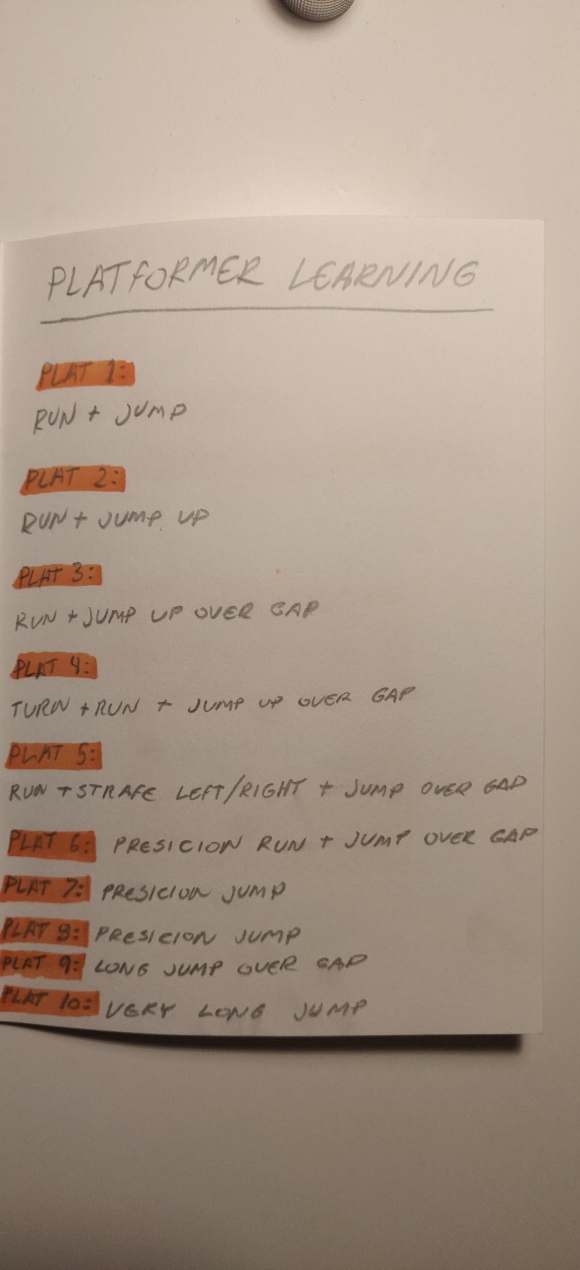
I want to emphasise that the game itself is not the focal point of this project, but rather something that helps prove the concept that is the controller. The game fits in the genre «platformer» and is inspired by the legendary «World 1-1» level from the first super Mario bros game on the NES. Platformers are really the simplest form of 3D games as its core gameplay only consists of getting from point A to point B though traversing various obstacles. I took the idea that Shigeru Miyamoto used when designing world 1-1 for Super Mario Bros for the NES. That idea consists of naturally teaching the player the rules of the game without using a single word. I wanted to incorporate this natural learning curve into the game by making the level gradually harder and harder.
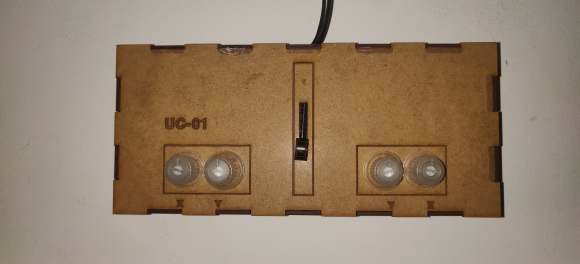
The controller consists of 5 potentiometers, four of them dials and one of them a slider.
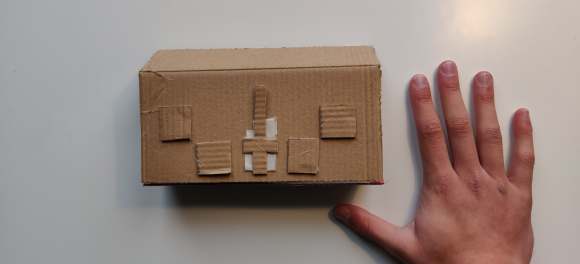
This is a cardboard prototype I made of the controller to test the scale of the controller.
The first dial from the left has the letter X under it. This dial control movement, and it correlates to the D and S keys on the keyboard. D controls movement to the right, and S controls movement straight backward. Here we already see a break of convention. People would normally assume that the two outputs move along the same axis, so for example D and A (which controls movement to the left) instead of the S. D and A both move on the X axis of movement, while W and S move on the Y axis. The X under the dial does not represent both outputs on the dial, only the D command, since it moves on the X axis.
The second dial controls camera movement up and left. When the dot on the dial is pointing straight up the dial is in a so called neutral state, where it doesn’t output anything. By twisting the dial to the left your character looks up, by twisting it to the right your character looks to the left. Heres another unconventional feature. On regular controllers when you release an input, say when you let go of the joystick, it automatically snaps back into the neutral state where there’s no game altering output, whereas with my controller you have to do that part manually and not rely on the controller to solve the issue on your behalf automatically. This leads to a lot of interesting outcomes when it comes to gameplay, as most people generally don’t have the ability to manage the direction / output of multiple dials at once while playing a game. It also brings with it the possibility of conflicting outputs. For example you can output both A and D at the same time. A wants you to move left, while D wants you to move right. The result is your character shaking in place.
In summary my idea is about challenging / showing how fragile the feeling of control can be. Some small details can be altered, and your control slips away.
DOCUMENTATION
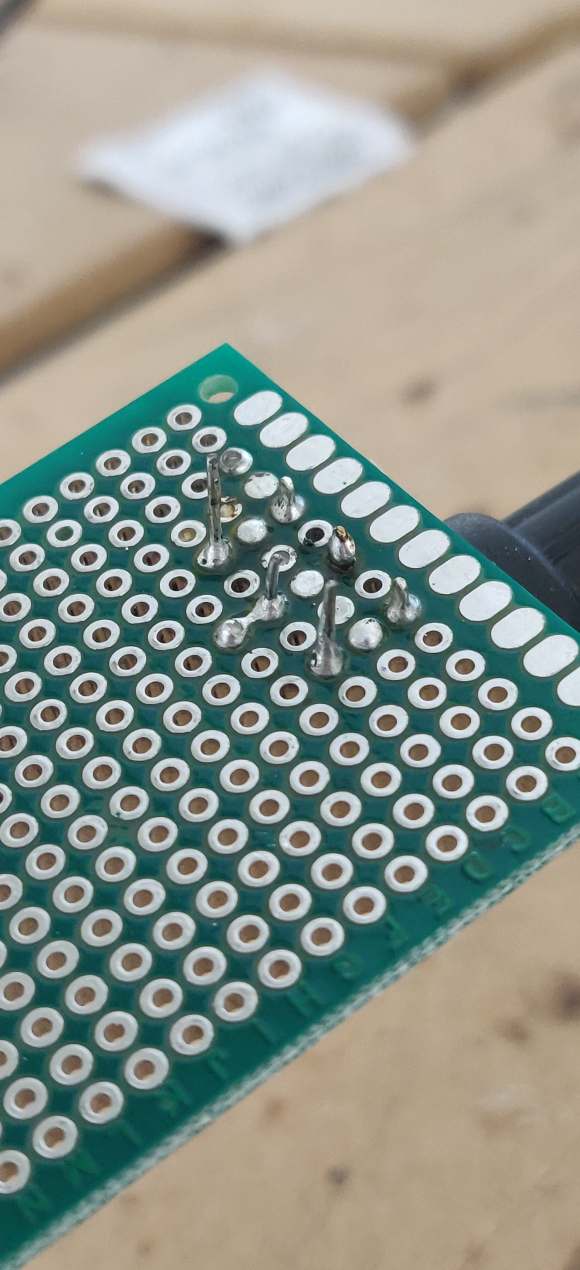
First time soldering.
The wiring for the four dials. The cables were later soldered directly to the dials.

This is the illustrator sketch for the lasercutting.

The laser cutting process.

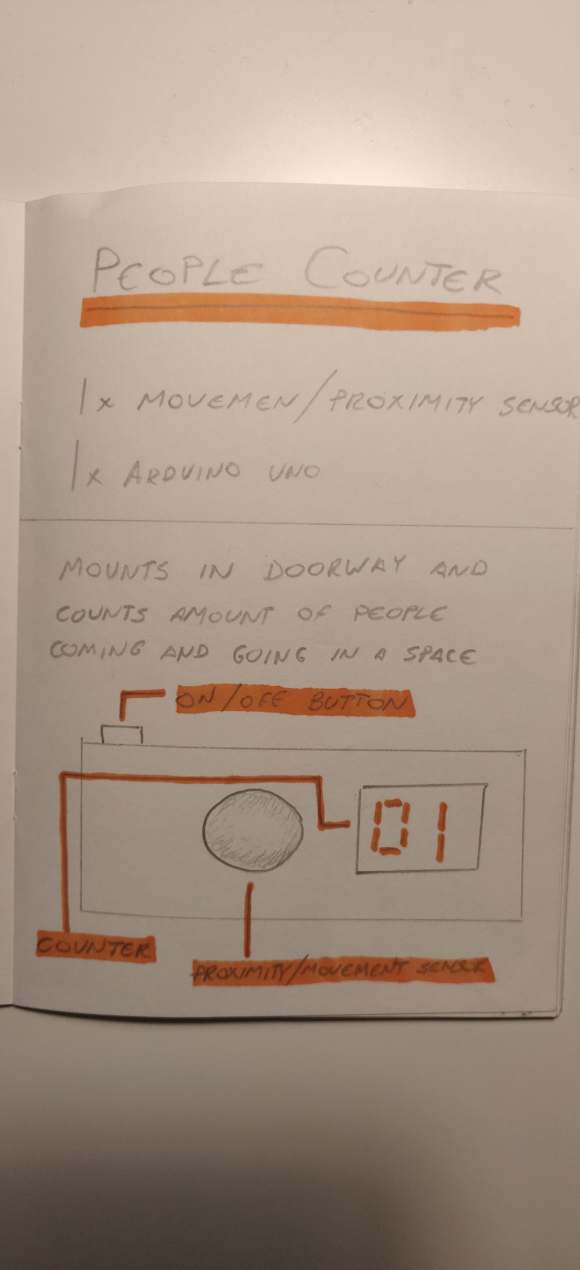
This is the first idea I wrote down in my notebook. it was my planned idea until I learned that we weren’t allowed to use proximity sensors.
This is the origin of my final concept. Most of the points here made it through as important concepts in the final build.

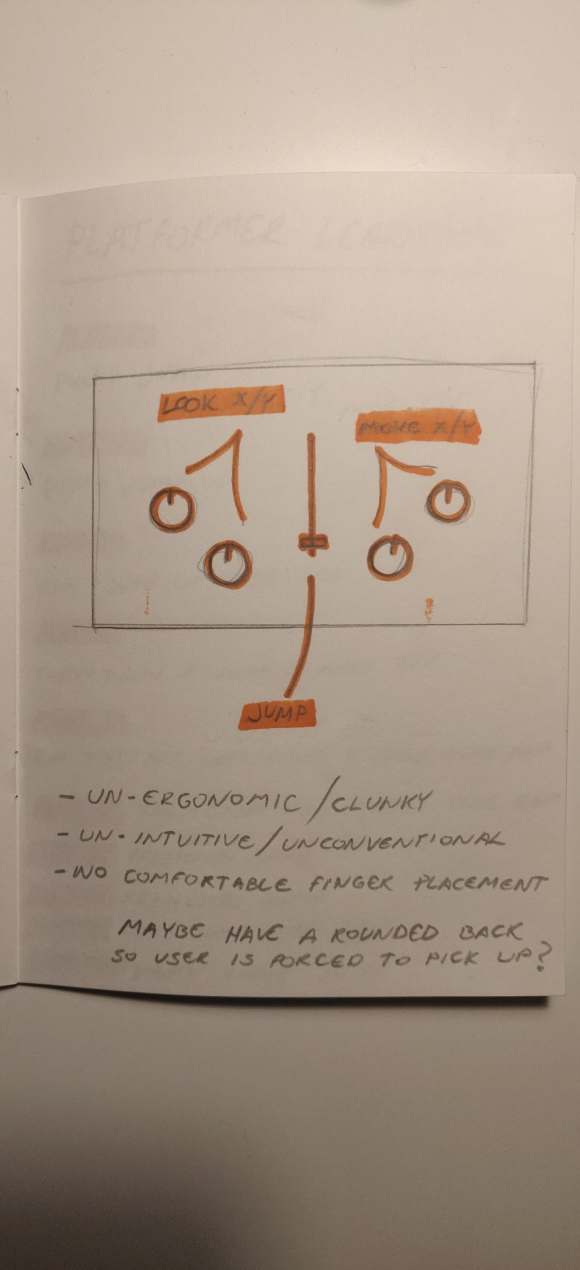
The first control scheme concept. I later realised that this was way to similar to regular control schemes, and would therefore be way to intuitive / easy to use.
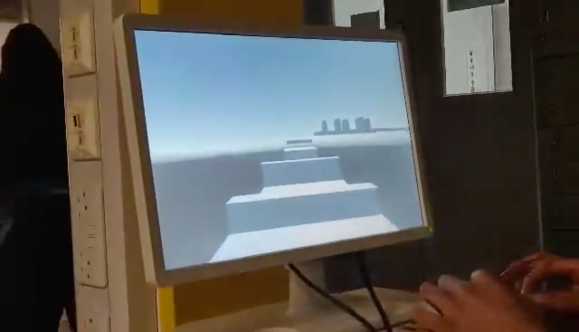
Close up of the final display with gameplay and controller.
RESEARCH
EXPERIMENTATION
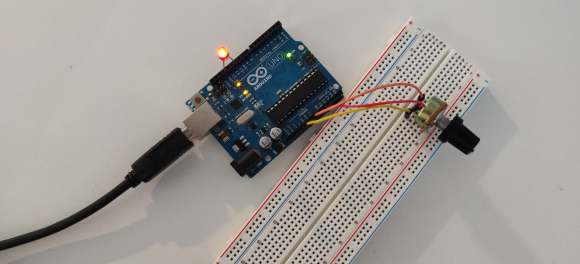
My first working Arduino circuit. The dial controls the brightness of the light.
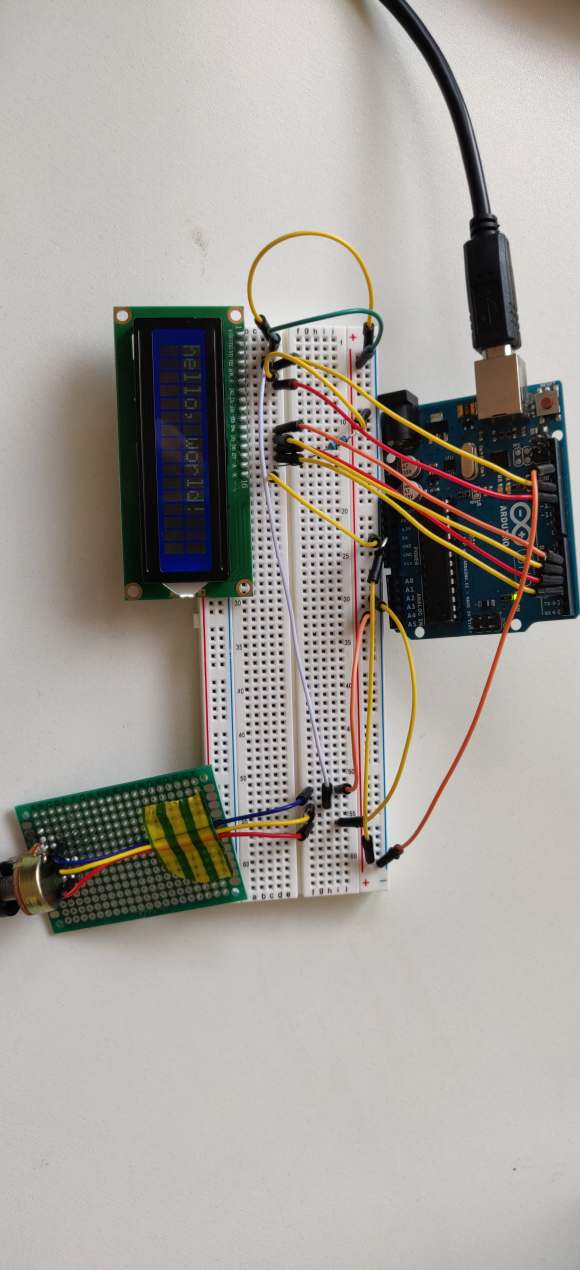
I experimented a bit with a LCD I had in my Arduino kit. The dial controls the brightness of the display. I was at one point considering using the lcd for my final idea, but I quickly realised it would be more limiting than giving.
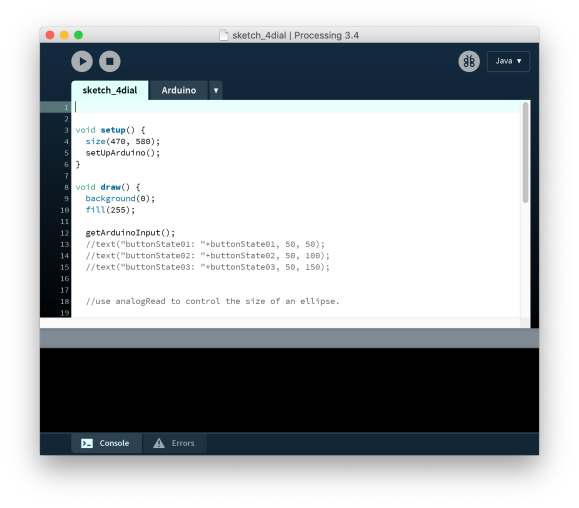
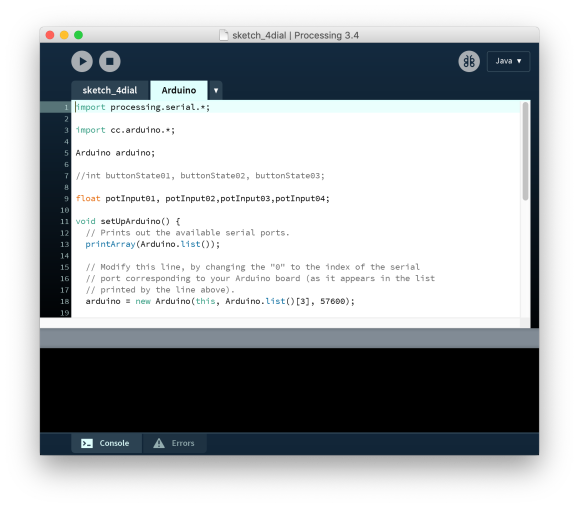
I used this processing sketch to test the individual outputs of my dials. The sketch draws two ellipses. The ellipses’ scale on the X and Y axis are controlled by individual dials.
BIBLIOGRAPHY
Massimo Banzi:
https://www.youtube.com/watch?v=grU7eNPBRxk&list=PLT6rF_I5kknPf2qlVFlvH47qHvqvzkknd
LCD tutorial:
https://www.youtube.com/watch?v=Mr9FQKcrGpA&t=148s
Drive:
https://drive.google.com/drive/u/2/folders/1paEeAg8JRMuJEwPdmSugUhe3ACZqkblj
LCD tutorial:
https://www.youtube.com/watch?v=Mr9FQKcrGpA&t=148s
http://www.circuitbasics.com/how-to-set-up-an-lcd-display-on-an-arduino/
Hex-Coder:
https://www.youtube.com/watch?v=7zffjsXqATg
Respawn:
https://www.youtube.com/watch?v=nBgCeJBMT0k
FPS mapping:
